


Hi!, welcome to my blog post where I'd take you through making your first commit on GitHub.
First, it is important you understand that GitHub just like Gitlab is built on git, which is a command line tool, this simply means GitHub gives you among other features, a graphical interface to git. Working with git and GitHub would require executing some lines of codes on your computer terminal. Let's get to work.
If you are new to open source contributions, you might want to take a look at my other article on a beginner guide to open source contribution to get you started.
I'd like to think you have read the contributing.md and read.md files of the project you chose,picked up an issue to fix on the project, indicated interest and have been assigned the issue.
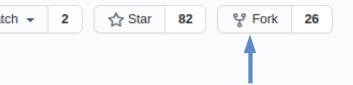
In order to make contributions to a project, you would have to fork the repository (get a copy of the project to your GitHub account), at the top-right you would see a fork button as shown below:
Also take note of the number of the issue usually displayed as, for example, #12, you would need this while making your pull request later on.
 Wait for this to be done
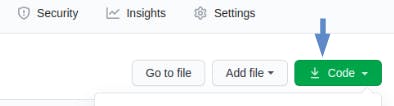
 Next, click on the clone button as seen here:
 Then copy the url you see, click on this icon or highlight the url and copy, you would soon be needing this url you just copied.
 Now, go to your computer terminal and enter the following;
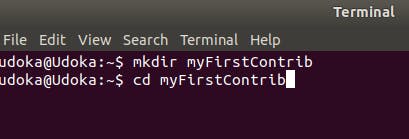
First, you should make a directory where this project files would be downloaded into your local computer, and change into that directory as shown here
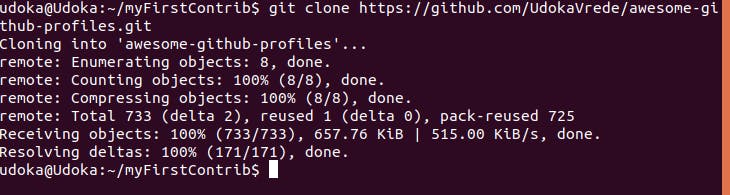
 It is now time to get the project files from your earlier cloned GitHub repository to your computer, this is done by, entering git clone then paste the link you copied like this
git clone https://github.com/UdokaVrede/awesome-github-profiles.git
your link should have a .git extension at the end when pasted. Press enter, and wait for the project to get cloned to your local computer as seen below
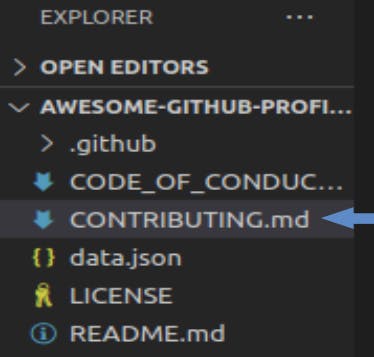
 Once, completed, close the terminal and open the folder you just created in your preferred code editor, I used visual studio code for this.
On your terminal, enter the following as shown below
git checkout -b main
main is the name I gave to my branch, so give your branch a name, please do not use main as this might be the name of the actual branch on your repository, you do not need conflicts.
This creates a new branch which is a duplicate of the original branch from it's beginning to the point where the new branch was created, this is done to avoid messing up contents of your original branch. Now you are in a new branch, enter this in your terminal,
git init
as seen here
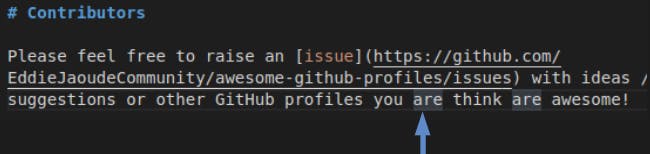
 Now go ahead to make your changes. For the issue I am fixing here, which is a typo in contributing.md of this project, I'd have to locate Contributing.md to fix the error as seen.
 Make all the required changes and save. This was the typo.
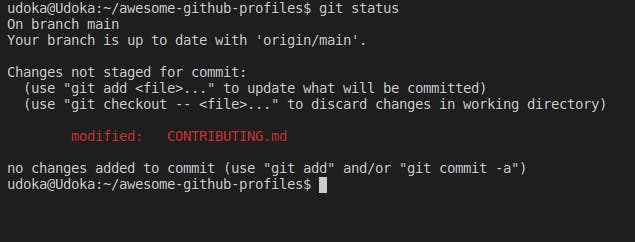
 Now you can add, commit and push your changes back to the branch you created earlier. Note, to see the current status of your work, run
git status
you would see something like this;
 you can now add the changes, you made by running,
git add .
to add all changes,
or
git add CONTRIBUTING.md
to add specific files or folders.
Note, you should replace CONTRIBUTING.md with the name of the modified file, I used CONTRIBUTING.md because, it is the file I made changes to as seen above. To see that your changes have been added, run
git status
Next, commit your changes with a message on what you did as seen below
git commit -m ''your message should go in here''
 Note: Different projects have their own specified way of making commits. At Layer5, where I have made some contributions, you are required to add a sign-off message, do well to read the contributing.md file carefully while making your contributions.
Now you have committed your changes, next, you would push your changes to the branch you created earlier, if you can no longer remember the name, run
git branch
you would see the name of the branch, as seen
 Now, push the branch you just saw, by running
git push origin main
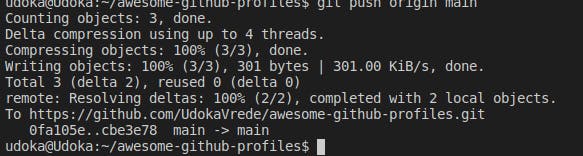 Note: main is my branch name so use the name you saw when you ran the git branch command
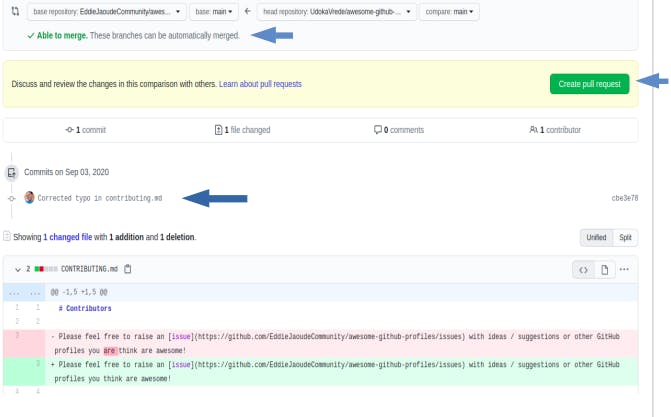
Next, go back to your github repository, you forked and refresh, you would see this
 Click on compare when this appears;
 If you there are no conflicts, you would see the "Able to merge" message in green.
you can scroll down to see the changes you made, also notice your commit message you entered earlier while making your commit besides your profile image.
If you there are no conflicts, you would see the "Able to merge" message in green.
you can scroll down to see the changes you made, also notice your commit message you entered earlier while making your commit besides your profile image.
Creating your pull request
When creating pull request as shown below, reference the issue which your pull request fixes, this can be done by simply stating points like
This pull request fixes issue #followed by the issue number
In this case, mine was 74, if you forgot this, right-click on issues and open the issues in a new tab, search for the issue you are fixing and get the number of that issue.
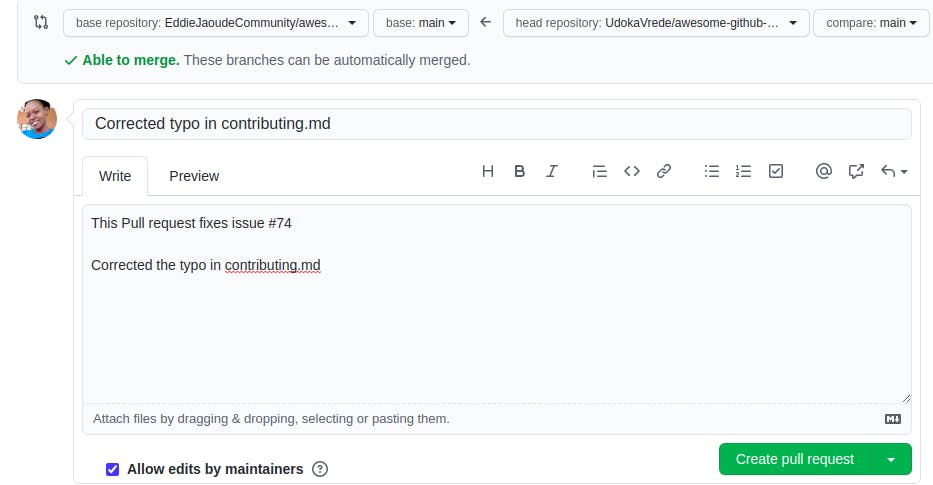
You also need to give a brief and detailed description of what you did, do not forget to do this, it explains your changes to the maintainers, as seen above.
When this is done, click on the green colored create pull request button to create your pull request and this below brings you to a successful end of your first commit.
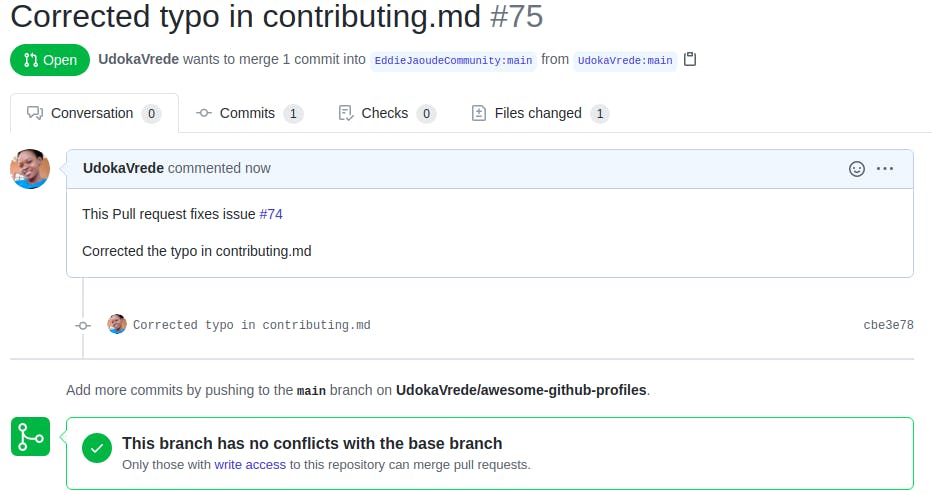
Congratulations to you.
Once, your pull request is reviewed and satisfied to have met its necessary requirements in relation to the issue, it would be merged.

Kudos to you, you are finally an Open Source Contributor.
If you have any further issues or questions, feel free to contact me on Twitter and follow me on Github.
If this was helpful, drop a comment, like or share to your friends